Showing posts with label monthly kit clubs. Show all posts

Tuesday, February 21, 2017

And The Kit Club I Joined Is....

Just a teaser....  I'm gonna try and make you read through the basis for my choice and how to create your own process for choosing. 

To begin with you need to take some time to really think about a few things relative to YOU!

What do you typically scrap?
1.  children... male or female children... or both? 
2.  lots of vacation photos?  city scenes or outdoor-sy? 
3.  events?  weddings, holidays, parades, parties, sports?
4.  everyday, non-event moments... cooking, gardens, shopping, comic situations?


Analyze some of your own favorite pages!  (Go ahead, I'll wait, go find 'em...)
1.  do you like to use a lots of pattern paper, all on one page? 
2.  do you like to fussy cut paper and use it as accents too? 
3.  are you more drawn to pages that are chock full of embellishments?
4.  or, are you more partial to clean and simple with smaller touches of embellishments? 
5.  are there colors that you seem to gravitate toward? 
6.  do you turn most of your photos to black and white or do you use color photos more often?
7.  do you routinely re-size your photos, or more often scrap basic 4x6 photos?

Does it matter if supplies are club exclusives or products that are out in the marketplace? 

What's your budget? 
1.  are you ok with buying a main kit and lots of add-ons every month?
2.  or, do you see yourself buying mostly main kits and adding from your own stash? 
3.  are you more of a beginner scrapper with a limited stash? 
4.  or a seasoned scrapper with plenty of things to supplement a kit? 

Do you like to throw in some mixed media on your pages?


How interested are you in a kit clubs' blog, website, or facebook page?

Now, is your head already reeling?  Mine kind of was when I began looking at clubs. 

For ME (not you---just me now), this is what I came up with.
I scrap my grandchildren, my adult children (when I can get a photo of them!), everyday moments more than events, not a lot of vacation photos--but more outdoors shots.  

I am a pattern paper person.  I like to layer it, fussy cut, mix it all up.  I am not so concerned with receiving solid cardstock; I have a lot in my stash and it's relatively easy for me to find locally.  I'd rather receive more pattern paper. 

While I like embellishments, I tend to use smallish clusters, enamel dots, tags and labels.  I am not a cute-sy, pa-tootsie person.  That is, cartoon type critters, dolls, kids; not so much.

I also hate that white halo around stickers and die cuts...  sometimes it is useful to make the item stand out against a like colored background, but I am just not a fan.  I'll use them here and there, but more often than not I will place them against a plain white background so the white halo kind of disappears.  (Or I have been know to sit with scissors and cut the halo off altogether.  I know, I know... kind of nutty.)

I want a bit of what's new on the marketplace--not too interested in exclusives. 

I think I should be able to make several pages out of a main kit only.  I don't mind buying add-ons every so often, but I simply cannot afford to purchase all of that each and every month. 

I like to add some mixed media stuff in and I like simple easy and quick pages... so I have a split personality!!!

And since we moved out of our home state and out into the country... I look forward to a friendly FB page, sharing my projects and seeing other people's work. 

This was the criteria I used when trying out various clubs. 

Please remember,that your style may change over time.  A kit club's style may change too!  What works for you at one point in time may very well change.  And then you'll be right back to making another decision.  So what?  This is what keeps everything interesting folks!!! 

So, drum roll please,  I joined.....


Gossamer Blue!

I found things I truly loved about each club I tried on for size.  And I will probably go back and order kits, from several of the clubs, a la carte, from time to time.  But, for me, right now, Gossamer Blue seems to fit me, my style, and my subject matter. 

Your choice will (hopefully) be made based on criteria that you have chosen for yourself and I'd love to hear about your process and decisions!! 

best,
Cheryl

Monday, February 20, 2017

Kit Comparisons continued - My Personal Process for Choosing a Kit Club

And here we are with my last review!  I'm settled in with my morning coffee, I'll wait for you to grab yours--coffee, tea, how about some hot cocoa?  Ready?


Hip Kit
I chose to review them last, partly because they are hugely popular and already widely known.  Not really sure why that made a difference to me, but there you have it. 

I found the materials supplied in the kits to be very pretty, high quality.  The first kit contained marketplace products, however the second kit had quite a few exclusive papers.  While I am not in the market for exclusives, the papers were of high quality, both in color and paper weight, just not what I am personally looking for. 

Paper
Each kit contained eight sheets of patterned papers.  Not sure if they ever include solid cardstock sheets, but I did not see anything listed for the past several month's worth.  Once again, I'm OK with that...cardstock I've got and it is relatively easy to find.  As I already said, I was disappointed to receive several exclusive papers in one of the kits.  Papers were well coordinated with respect to color, but again each kit seemed very pastel to me.

Embellishments
Each kit contained an assortment of exclusive wood veneer pieces and a full embellishment or ephemera pack.  There is a variety of the sort of embellies included in the kits. One kit included a rubon sheet and full pack of metallic instagram frames, while another kit included a pack of mini tassels, a pack of sequins and a second set of Thickers words and phrases (besides the Thickers alpha as described below). 

Alphabets/Titling Options
Each kit contained a Thickers alphabet set, and as I said before one of the kit also contained a word/phrase set (which was included as an embellishment).  In former kits I did see sticker sheets (again included as an embellishment) that also had words and phrases easily integrated into titling options.

General
 A few too many exclusive papers for me, although to be fair I see that their current (February) kit papers are all marketplace papers.  Very pastel and a decidedly feminine feel to each of the kits.  It seemed like I would have to turn to the page designers' trick of turning photos to black and white to be able to make pretty pages.  I just don't scrap that way; I scrap real life--4x6--color photos.  Occasionally I might look at a photo and think this would look cool in black and white and print it that way, but not on an everyday basis.

The kits arrived in a timely fashion.  Their blog has many ideas--although not as many for 12x12 pages as I would like to see...I found many more ideas on you tube than on their blog.  Their facebook group has a big, big following but for the number of folks that follow it...not a lot of them seem to post their pages.

My favorite page created from a Hip Kit club collection...


As far as ideas in using a Hip Kit offering... check out you tube.  I found numerous examples of wonderfully creative pages done using Hip Kit collections.

Next time... The club I chose to join and why that club is a good fit for me.  Plus a review of questions and things you should think about when joining a club. 

Sunday, February 19, 2017

Kit Comparisons Continued - My Personal Approach to Choosing a Kit

Here we are at a look see at another kit club. 

Like I said before I only just received my second kit and am not anywhere near done with it.  But we will forge ahead anyway!  It was my own fault I did not get two kits in a row from them, I just did not hop on to the website in a timely enough fashion to place my order before they had sold out!


Gossamer Blue
The kits each seem to have a decidedly different perspective as it pertains to color, patterned paper and even embellishments.  Which means to me, that there is always something new to look forward to.   I had a very easy time making a variety of travel, girl, and a boy-ish page(s).   I did go to my stash for some alphabet stickers that seemed to work better with some pages, but other than that the only other thing I added was a doily and wood veneer car. 

Paper
In each kit I've received 7-10 patterned papers.  If the kit is sending 7 patterned papers, then it also contains 2-3 sheet of cardstock.  Now I have seen a kit or two which contained 10-11 patterned papers and no cardstock (which is still fine by me, I'd rather have the patterned paper any day).

The papers are incredibly well coordinated and most times I've had a hard time choosing which side of a given paper that I want to use more.

Embellishments
Each kit includes at least two full packs of die cuts or ephemera.  The things that change from kit to kit are offerings like enamel dots, washi tape, sticker sheets or chipboard.  There is usually an exclusive set of wood veneer and/or acrylic pieces.  In past kits I've seen partial packs of sequins, or mini pom poms, tassels, and even decorative paper clips.  Fun stuff, and it changes from one month to another.

This is another kit club that at times have included a stamp set---and as I said before I do love getting a stamp set! (There are stamp sets offered in their add-ons, if  they are a must for you.) 

Alphabet/Titling Options
In each of the two kits I've received there was either a Thickers alpha set or a puffy alpha set, plus at times the sticker sheet that may have been included also had phrases and words that could easily be used in forming a title.  In one of the kit I missed out on, there was a Thickers set with words and phrases and a sticker sheet with words and phrases, plus a mini alpha.  

General
Kits arrived without delay, no damages.  They have no membership requirements, as long as cancelling is done within the designated time frame.  The facebook page is not as active as some kit clubs, but still a friendly place.  Their blog is full of ideas, although I personally could do without so many planner or project life pages (sorry I am strictly a scrapbook page addict).  But I understand each of these (planners and project life) have taken on a lot of popularity.  Their designers are creative of course and each kit is well represented. 

One of my favorite pages created from a Gossamer Blue kit... The only add to this page was some vellum for layering. 


Next time, Hip Kit is up! 

Friday, February 17, 2017

Kit Comparisons -- My Personal Decision Making Process

And here we are with a very popular kit club to review.  Bear in mind, my opinion in no way should be taken as an endorsement for or against any of the kit clubs I tried "on for size".  Each club has its own distinct look and feel and each contains many wonderful papers and products for us to play with. And each club will appeal to different people for different reasons. 


Citrus Twist

Papers
Each kit contained six patterned papers and two sheets of cardstock.  Sometimes one or two of the patterned papers were exclusive to Citrus Twist.  

Embellishments
Each kit I received contained a veritable plethora of embellishments in the form of at least two full packs of ephemera or die cuts, usually a sticker sheet, small acrylic pieces, full packs of sequins (and that's a lot of sequins!). One kit contained a partial pack of decorative paper clips, another contained some mini  tassels.  Also contained in each kit was usually an exclusive chipboard sheet, an exclusive cut apart sheet, and some sort of ribbon, fiber or washi tape.  In other words, there are loads of embellishment choices. 

Each kit I received also included a stamp set, which I have to say I  a.b.s.o.l.u.t.e.l.y.  loved. 

Alphabet/Titling Options  
The initial kit I received contained a puffy alphabet set, while the second kit contained a Thickers word/phrase set.  Each kit also contained other titling options either by way of a chipboard set or a sticker set that also had within it a small alphabet set or words and phrases.   No lack of titling options here.

General 
Each kit arrived in a timely fashion.

I found that the club offered many items that were very current in the marketplace.  The overall look and feel seems very feminine to me and while I do have a grown daughter and fabulously cute (not too biased, am I? LOL) granddaughter, I look for colors and prints that can be used for boys too!

We all like embellishments, but I have to say I was kind of overwhelmed by the sheer quantity of embellishments included.  If you are big on embellies, you'll adore this club!

Their facebook page is fairly active and the blog has some regular repetitive features to look forward to seeing a designers' take on each month.  And they truly have some wonderful, creative designers.

My favorite page created with a Citrus Twist kit:


This page was created much more in tune with my personal scrapbook style, patterned papers, a smattering of clustered embellishments--but not a lot of them.  This was one of the exclusive Citrus Twist papers and there was absolutely nothing out of my stash--well unless you want to count the white pain splatters, haha!).  Most of the other pages created were more heavily embellished (since I had gotten so many of them I felt I needed to learn to use 'em!!!).  I did find I was relying more on plain white paper backgrounds (or painted them) and made use of a lot of the included die cuts as layering materials rather than cut into the pattern papers.

I did make a couple of "kind of boy" pages---but it was stretching a bit. A few of the papers I thought would do well on a more masculine page did not seem to coordinate well with other papers.  Now perhaps if I had ordered an add-on kit of more papers, this would have been a mute point.  But this was not in my "rules" for comparing the various kits.  It was to be main kit only. 

Next on the hit parade will be Gossamer Blue...

best,
Cheryl

Thursday, February 16, 2017

Gossamer Blue Layout -- p.s. i love you

Most of my journaling on my grandchildrens' pages is more like a little thought or note to them from me.  My little granddaughter is shall we say, a headstrong young lady, a little power house.  I wanted to recognize that but also remind her to show her wonderful heart and kindness, p.s. i love you, Nana. 


I had tried to do this page several times before using a color coordinated effort in blues and greens (like in her school jumper).  Uh, no...  it just didn't work.  But when I received the February Gossamer Blue kit and saw several black and white patterns, strong... yet softened by the p.s. i love you message, I thought I'd give it a shot.  BINGO!  I did add just a little really light pink watercolor and some splatters of pink, but other wise pretty much left the white card stock background, well pretty much plain white.


I cut and tore several pieces of the black and white patterns and lined them up against the left edge of the page and tucked in a piece of ruffled white tissue paper, again for softness. Then curled up the edges here and there and tucked in a couple of floral stickers to brighten up all that black and white.

The photo got treated to several layers of tissue paper, a piece of the black and white text and just a wee small amount of pink peeking out directly under the photo. 


I cut two banners and outlined them before tucking them up under the lower corner of the layered photo.  Then went to work on a little cluster consisting of a doily sticker (kind of flimsy so I put it on a circle cut out of a scrap of cardstock) and a small "pile" of hearts. I wanted that in place slightly touching the edge of the banners so it made a nice soft corner. 


Tucked in a bow shaped paper clip (from my pile of left over stuff), added my title and a few enamel dots and that seemed like just enough.  Oh, I almost forgot---didn't want the right side of the page ignored, so I cut a medium to large size photo corner and placed it up on the right side before I did my journaling. 

The note to Dear Bella went down the right side of the page and I was done!

See once I got a handle on the right papers, everything else came together.  It's all about the papers for me!


Maybe if you are fighting with a certain few photos, it's not that you've lost your mojo... maybe you just don't have the right papers in front of you!  Put those photos aside and try them again later with another set of monochromatic neutral papers... gold and white, black and white, kraft and white.

best to all!
Cheryl

Wednesday, February 15, 2017

A Hip Kit Layout -- I'm A Pepper

My daughter and son-in-law made a long weekend of it when she had to travel recently to Texas (a frequent trip for her).  One of the day trips they made was to Waco where they took in a museum at the old Dr. Pepper bottling plant.  (She does love Dr. Pepper!)  Anyway, I was happy to make a page for her! 


Everything except the alpha came from the January Hip Kit. I mixed a bit of  peach and pink spray mists with my texture paste before applying it to a plain 12x12 white piece of cardstock.  Once the texture paste was dry, I just laid down a few different widths of rectangular strips.  Slid the photo into place and tucked a couple of die cuts behind it.   


I used one of the wood veneers pieces at the lower right corner of the photo and tucked in another die cut that had just the right saying on it (and it fit in there just perfectly!). 


I often add a few small cut pieces of papers to repeat the colors or patterns and draw the eye in.  Although now I am thinking I may just go back to this one and add a few staples....


The only thing I went outside of the kit for was the alpha set.  I used a multi colored set from my stash that I just felt coordinated better with the colors in the photo. 


I added some loose outlining, black paint splatters, and my journaling and that, as they say,is all she wrote!  (I know, truly a bad pun...) 


Over all, even though I've struggled with this kit, I am happy with how this page turned out.  I think I've struggled with the kit, just because most of my photos just don't seem to go very well with the papers.  I'll maybe put the kit aside and once the weather begins to warm up a bit, perhaps some nice spring-y photos will work better.  Or, who knows I may stumble across just the right pack of pictures (that does happen, ya know?). 

best to all,
Cheryl

Monday, February 13, 2017

Last Kit Club Under Review --- American Girl(s) Layout

I cannot tell you how excited I am to be getting to the end of my so-called research!  While it's been fun ordering kits from various clubs, it's also been kind of stressful.  I mean there is much to like about each club and I'm frustrated when I cannot seem to produce pages that maybe gives each club their due.  But that is what the process of choosing a kit club for yourself is really all about!  Choosing the right club, for you, at any given point in time. 

This page was created from Gossamer Blue (remember I did get only one kit from them---months ago---then I was such a slacker when it came time to order that they sold out of several kits before I went back to order).  But this time I ordered right away and am more than pleased to get their February collection! 


And even though I have protested before about great quantities of pink in various kits...well it is February after all, so I can deal.  Besides, the part I am enamored with is that there are contrasting patterns and colors!  Hurray!  Here, I used the darker floral on the bottom third of the age and the smaller lighter floral at the top.

To mat the photo of granddaughter and her very special American Girl doll, I used a black and white script print and die cut several groups of leaves from white card stock to kind of imitate a cut file.  (I don't have an electronic machine to use with cut files, so this was my way to get a little of that sort of look.) 


The embellishment pack included these neat striped pieces which I used at the seam between the two floral prints.  I also cut several of the black label in half lengthwise and used those along the border, as well as the small circle stickers.  The kit included words and phrases in sticker format and in the embellishment pack, so it was easy to select a few of those to accent the photo with.  Also used the cute xoxo die cut and a couple of hearts in a cluster at the lower right corner of the photo. 

Adding a piece of that striped embellishment, a couple of stickers, washi, and two more half pieces of the blank labels created a bit of interest at the top of the page. 


This kit included a shiny black puffy sticker alphabet set for my title.  I was torn between American Girl(s) or All She Wanted, but in the end went with American Girl(s).  If this page was a bit more holiday in feel, All She Wanted may have fit better.  Since there was that gap between the edge of the page and the beginning of the word Girl(s), I added a piece of washi to fill it in, then added a small piece at the opposite side of the page too.  My journaling was short, so it fit right on those blank labels! 


All in all, this page came together pretty quickly, both because the papers and embellishments were perfect fits and because I chose one of my old favorites in page layouts---using a darker pattern on the lower third, a lighter coordinating pattern on the upper two thirds --- covering the seam between them with a decorative border and using that border to anchor the title.  It's a nice to have old stand-bys at the ready when you haven't been at the old scrapbook table for a while! 


I'll be working with this kit and raiding my stash in the coming days and also compiling my results of the past months of kit research.  My decision has been made, but I do want to share how I made my choice.   I hope that my process helps some of to decide if you even want to join a kit club and how to go about choosing the one that is right for you. 

more to come! 

Cheryl

Wednesday, February 1, 2017

Kit Comparisions - Down to the Wire!!!

So, after many phone calls, pricing questions, frustrating misquotes, un-informed sales people, etc., etc., I finally have real internet!!!  Ta-da!  The issues were where we are physically located, how long were we bound to our original choices, how much would our current bill actually come down and on and on...  It is a wonderful thing to not have to worry about how much data does one thing or another chew up! 

Now, to get back on track here.  I have received my second Hip Kit collection and I haven't even killed off the first kit I got!  Now please do not take my next comment wrong... the kit contained pretty papers, a nice Thickers set, a complete embellishment pack, a partial pack of cute little tassels... I'm just not feeling it though and have struggled with the couple of pages I did put together. 

After going through the papers, I decided to use the window printed paper and fussy cut a bunch out to layer across the page.  And I suppose I could have just used a photo that coordinated color-wise and ignored the window design... But there is something in me that just could not do that.  I chose to go with a photo of ... wait for it.... a window!  


This sort of print is not usually a favorite of mine, due to it's specificity.  But I was determined to cut out the cute little windows and use them as a part of the page design.  I also tore a panel off of  the grid pattern paper as a home for the windows and photo to reside on.  It provided some subtle pattern, rather than a straight white background. 

Since the photo has some stronger tones as compared to the papers, I outlined both the photo and the grid paper with a black marker.  


Tucked in a few strips of patterned papers and a couple of the die cut ephemera.  Fussy cut a couple little florals to use along with die cut flowers, then tied together two of the mini tassels and tucked those under one of the floral bundles. 


The alphabet I chose is a Thickers set I grabbed recently at Hobby Lobby.  I loved the mixed patterns and the size of them for this page.  And the title itself?  Well, I had to go with the song title, had to! 


Overall, it's one of those pages that I struggled with, but now that it's done, I'm ok with it.  Not jumping up and down, but the main thing is the page is done.  It accurately captures the spirit, my memories of the street scene, it doesn't feel over-done, nor is it plain.  Sometimes this is how the page gets scrapped folks! 


There are enough supplies left in my December Hip Kit to do a couple more pages, but since I've struggled with this one, and the January kit has been sitting here for a couple of weeks already, I'm moving on. 

While I have thoroughly enjoyed the process of working through the five or six kit clubs that I was going to choose between, I will be relieved (kind of) to actually choose a club to continue on with!  Not that I won't probably stray from time to time and buy a kit a la carte, when another club's offering is too tempting to pass up!

scrap on, my pretty paper friends!

Cheryl


Wednesday, January 11, 2017

Magic Unicorn - A Hip Kit Page

The pink and pastel colors in the December Hip Kit (main kit only) were just right,  picking up all the colors of my granddaughter's ever so striking unicorn bike helmet!  She asked for unicorns for her 5th birthday and she got unicorns!


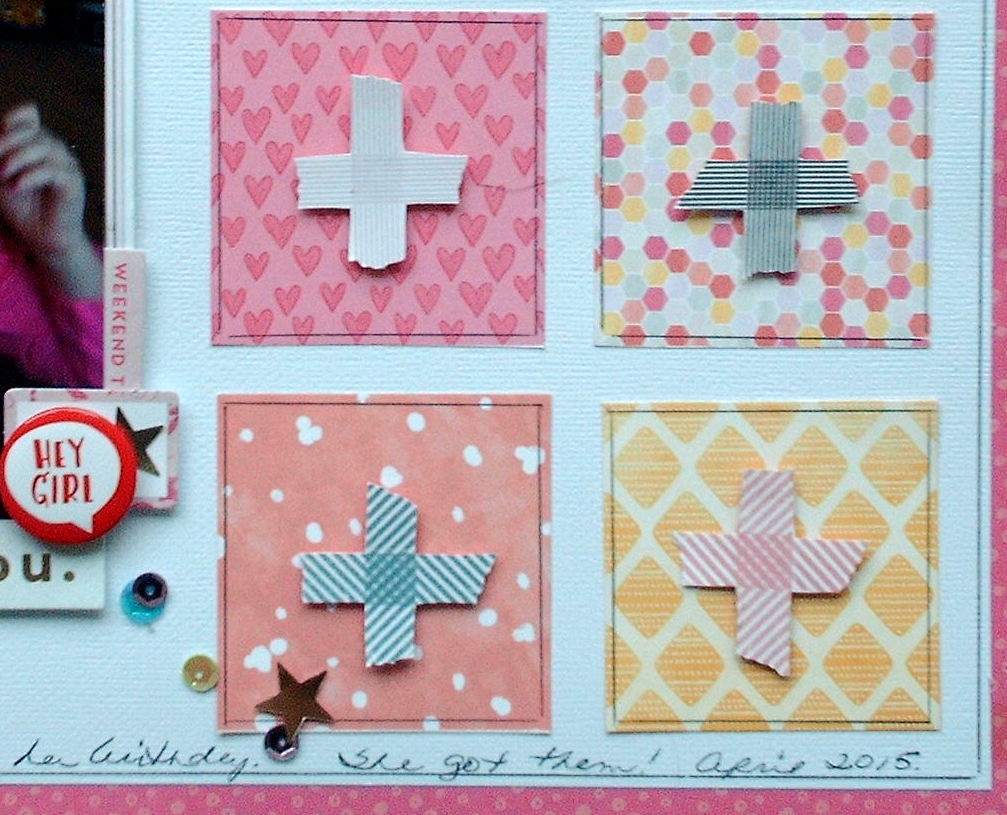
Do you ever get one of the those pages that has little 2-3 inch squares that are like miniaturized prints of entire pages?  Ever at a loss as to what to do with 'em?   There was a page like this in the kit; I used some on the Christmas tree created here Best Tree Ever page.    But, I had some squares left and decided that  I could use them as decorative elements down the right side of the page.  I cut out some of the washi criss-cross pattern paper and popped those up on top of the squares and outlined the squares for a little extra definition.  Since the little squares were outlined, I also took a moment to outline the white card stock. 


The white page was trimmed down slightly and layered on top of the hot pink patterned background, which was the same sheet the washi tape criss-cross pieces were cut from--just the opposite side.  I had cut the middle of the page out in order to be able to cut out those washi pattern pieces. 


Various cut pieces from the ephemera pack were layered up under the photo, along with a small polka dot gift bag (sorry--it came with little goodies in it from some kit or another---I just don't remember which one).  The title from a Thickers alphabet set which came in the kit lined up easily in place along the top edge of the layered photo. 

And since unicorns are magical, after all,  I just had to sprinkle some sequins and stars about!  A full pack of those were also included in the kit.


Now for a quick rundown---I am after all still running my kit comparison!  Hip Kit provided eight printed papers, a full pack of sequins, a partial pack of mini tassels, a Thickers alphabet set, and a Thickers foam word set, as well as a full ephemera pack.  I 've made four 12 x 12 pages and depending on what photos I turn up (need to coordinate with all this pink and pastel!!), I can probably make two more easily, but may need to supplement with an embellishment or two, we'll see.  And I kind of doubt if my cute little grandson will be making an appearance amongst all this pink... 

I ordered my second Hip Kit and I have one more Gossamer Blue kit to work in here somewhere, so thanks for bearing with me!  I know it's been a long road, but we are almost there!

best,
Cheryl

Saturday, December 10, 2016

Creating Joy - How to Coordinate Kit Club Papers

So, a little off the topic of how to choose a kit club, but important anyway.  Let's say you've chosen a kit club and you can't afford to buy the add-ons each month, AND you get a kit that although you love the papers, they are just not playing nice with each other! 

You can always use little pieces as I did on the "About You" page, but this time the papers all "individually" went with my photo; it just too much of same size prints, too much of just one color... 

I chose to cut the papers into two inch squares and quilt them together. 


 My original intent was to actually sew the squares down.  But my little sewing machine threw a hissy fit; and I need to wind a new bobbin and change the (now bent) needle.  Just do not have the patience right now to do that, so I moved on and decided to outline each square. 


See I loved these papers and they do well together, so now I am thinking forward on more ways to put them together.  It's funny how things work out, huh?! 


I crumpled some plain white cardstock and used some flat white cardstock, as well as a piece of the corrugated red that came in the kit; tucked in part of a doily, a couple of the tabs (also included) and a few silvery die cut pine srigs (I cut those). 


The Joy title was cut from the papers, and just to make the squares a little more interesting, I used several more of the included tabs and pretty much called it done. 

This has been a fun page to make, but now I have to go wrangle up a new needle, and fight with a little pink sewing machine (LOL)! 

best,
Cheryl

Friday, December 2, 2016

Citrus Twist Update - Layout #4!

Whew!  Actually managed to make a page using papers from my November kit, not just snippets and strips!  These papers, the wood veneer hearts, plus the white and black word stickers are a match made in heaven selection. 


It's not a happy subject, but everything we scrap about isn't always cupcakes and roses!!  The page is about moving out of state and away from my kids and grandkids.  The journaling is personal so I've hidden it on a card behind the photo (the "hello" is a pull tab to view the card). 


I was really pleased with the combination of light and dark pattern papers and then using the light and dark journaling word stickers from the kit.  


Also used a cellophane bag and a crumpled piece of patterned aper behind the photo for some lift and
then tucked in some pieces of ephemera from Crate Paper's Cest a la Vie collection, as well as the journaling card and tab.  I loved the accents of gold from the Crate Paper ephemera! 


I also used plenty of the wood veneer hearts, as well as the last couple cork painted hearts from the kit!  Along with one of the wood veneer hearts, I used a piece of one of the cork stickers and one of the cut-a-part words, a strip of paper and small punched strip for the cluster at the bottom of the page. 

The title letters are from an older Thickers pack (one I think I picked up at Tuesday Morning over a year ago!). 

Added some outlining in both black and white inks and this one was done. 

Moving away was one of the hardest things I've done.  But I am glad to have the opportunity to scrap it for the future....  It's our life. 

Scrap your life, the best and the not-so-best.  It'll be important to someone down the road! 

best,
Cheryl

Wednesday, November 30, 2016

Citrust Twist Kit Reporting - The Third Layout

Still trying to work with the November Citrus Twist kit, still struggling with this one.  I wound up using mostly elements that were left from the prior month's kit with this month's stamp set, some of the wood veneer hearts and just a few snippets of the papers.  


The photos are layered with left over cuts from one of last month's papers, a tag, the die cut leaves and flower, as well as the title card. 


The only papers from this month's kit are the several tiny strips, and a bit of the peachy print that peeks out from under the photo(s).   Also from this month's kit are the cork hearts, as well as the wood veneer hearts. 


I did a bit of outlining, added some ink splatters and the metallic enamel dots, plus a banner (cut from a miscellaneous scrap laying about on my desk).


Once again, while I am pleased with the outcome, I still do not feel I have been able to make good use of the materials together, in kit form, to create the page.  Something to keep in mind when selecting the kit club you will be working with month to month. 

There is one more page I have to present from this month's kit (and I was actually been able to use papers -- from the kit!). 

Later all,
Cheryl

Monday, November 28, 2016

How to Choose a Kit Club -- An Update... and a Layout!

This is only the second page created from my second kit from Citrus Twist.  Let me preface my comments with the following...  in no way am I going to ever say one kit club is "better" than another.  Ever.  It is a highly personal choice, depending upon what you scrapbook, your personal style, and your budget.


Which brings me to my update on Citrus Twist kits.  If you love embellishments, this is definitely the club for you! 

They ship reliably. On time. Every time. 

The kits include six patterned papers from newer releases.  You also get two sheets of cardstock and, as I said a lots of various embellishments. Oh, I almost forgot--a stamp set---love that!  In my first kit I received a Thickers alpha set, but the second contained a Thickers phrase (word) set.   

However, I found my second kit to be a bit disjointed.  Things just did not seem to go with many of my photos and I finally just gave up and went with the three pages I made that I was happy with.  And I am very happy with those three pages... and I am sure that I will use the remaining papers (they are actually quite nice) and supplies, just probably not together. 

My goal was to use two kits with each of my chosen clubs and to work with the main kit only.  If I were working with the main kit and an add-on or two, I'd have found it easier to create more pages.  But my aim was main kit only...so.


As you can see from my page, I didn't use a lot of the papers, just cut pieces to make banners and the chevron arrow thing-y layered with a circle cut-a-part and a couple of the word stickers.   


The papers that are layered under the photos are cardstock pieces from my scrap pile. 

The sequins came from a prior kit and I mixed in some of the puffy circle stickers, as well as using some ink splatters in medium blue and lime green.   I also used the stamp set below the photo, as well as on one of the cut-a-part labels. 


The title was created by rearranging some of the Thickers words. 


I do really like the finished page and I will have one or two more pages to talk about from this kit.  This would normally be the sort of page I would create to utilize scraps and leftovers, not right from the get go of opening a kit. I guess my lesson to be learned with this kit is more about how to use papers that you are struggling with.  I used just small pieces to create banners and chevrons... still leaves the larger pieces to be added to my stash and likely used with other papers from older collections. 

Moving on! 

Cheryl